Friday 16 December 2016

Just made it

I made it. I knit really fast to outrun the end of the ball of wool and I cheated a little bit by worked some extra decreases so I wouldn't run out.
 That's actually not a bad margin but it was getting pretty scary by the end.
This is a really cozy scarf that you can knit with any yarn in your stash or splurge and buy something special to wrap around your neck through this snowy winter. You get to decide the depth of the scarf. This one is 8"/20cm deep worked in DK wool.

This one is 5.5"/14cm deep in fingering weight wool. The first triangle determines how deep the scarf will be and it's totally your choice.

The pattern is not quite ready yet but it will be soon and it will be a Freebie with my Newsletter, as my Merry Christmas and Happy Holidays gift. If you want to sign up to get it go here and subscribe to Cabin Fever Newsletter .

Maybe you'll want to make a nice scarf for yourself with all your odd balls after the big day.
-Deb

Friday 9 December 2016

Yarn Chicken

Sometimes the end of a project creeps up on me without even knowing it. I am knitting a scarf with triangles and reached this variegated triangle and realized I had only this much wool left. Yikes, that was close.
Now I am trying to finish one last triangle, the royal blue triangle beside it, knitting as fast as I can to outrun the end of the wool.
I have this much wool left ...
to work 5 more rows and then cast off. I don't know. It's not looking good.
-Deb

Friday 2 December 2016

Top Down Inside Out hats

It's December and it's trying to be winter here but one day winter, one day fall (rain) isn't really doing it. The odd day of snow is still getting me in the holiday mood. I'm coming down to the end of my Christmas knitting. Wow. Just a couple of things left on my list. Pat, pat, pat on my back.

I finished an experimental hat. It's black
 so of course, it's not so great to photograph but I'm really happy with it. This started with a photo of a hat from Pinterest that my daughter sent me saying "I want this, I want this". So here I am doing the mom thing. I looked all over Ravelry and couldn't find a pattern exactly like it. So I bought some yarn from the odd ball bin at a yarn store and started. I hadn't used this yarn before and I was changing the needle size and I didn't want to do a swatch first (shhh, did I say that out loud?!) so I started at the top.
I cast on 8 sts, so awkward at first but once I had about 24 sts on my needles I was good to go. I did check my gauge once I had some fabric and then went to the Need A Hat bible book to find the number of stitches I needed for my gauge. Good thing I have a copy or two around.

The only difficulty with knitting from the top is the cast off. I'm a really, really tight caster offer. A tight line at the brim is soooo not nice. I also wanted that "store bought" look where the ribbing appears to go around the edge. I trolled around the internet and found a sewn-off tubular bind off. It's a Kitchener Stitch variation so if you don't mind Kitchener stitch this might work for you too. It's a bit of a pain to begin with because you need to have 6 times the width of the cast off amount of yarn on your sewing up needle (that's 6 x 22" hat, that's a lot of yarn). Pulling the yarn through each stitch at the beginning made me wonder if this was worth it but it totally was. I love it. It's stretchy and has the proper look I wanted. I will definitely do this again.
 Experiment was successful and is in the Christmas present pile. Now to the real deal. This hat is in fingering weight. I love a light weight hat. This is the fun part, I'm knitting it inside out.
 This is the correct "look" of the hat. B who wants to do all that purling? Inside out means more knits than purls and is working perfectly.
Now it's my carry around project , The pattern is set and now I know I have a great cast off that will work when I get to the slouch hat length. Makes me a little giddy.
-Deb

Friday 25 November 2016

The disappearing week

I missed blogging last week. I don't even know where the week went. But I have been doing lots of knitting and got a few things done.

More Stash Buster Socks finished. Yay. Add them to the Christmas pile.
I worked on my class for the Yarn Over Sleep Over Retreat in April. Seems like it's so far away but it will be here before we know it. One of my classes is Shaping Lace so I made up a scarf where you have to decrease away on the sides of the lace pattern and then increase. This gives practise for when you need to shape armholes and necklines in a lace pattern. This is what we'll get started on and then the knitters can continue to work the scarf (or not). Maybe I could call it Waving Leaves. Do you have a better name?
I'm also working on a scarf with triangles. They are my obsession at the moment. This scarf starts at one end and works to the other, attaching each new triangle to the next. The triangles get bigger and bigger to the centre and then get smaller. I was trying for an exact depth in the centre. It took a couple of tries. It turns out that that's quite a bit of knitting on a 3.5mm/US3 needle. But I really enjoyed it. And might just start another one.
I tried knitting a new scarf off the old scarf. Not a good idea. The garter stitch really puts permanent kinks in the wool that knit up unevenly. I know this, I was just so excited to keep going. I ended up ripping back the old scarf, dumping it in water and waiting impatiently for it to dry. Hovering over the wool and checking every 5 minutes does not quicken the process. Now there is much less wiggle in the strands.
I guess that answers the question of where my week went.
Deb

Thursday 10 November 2016

Retreat Mittens

Last weekend was another Retreat weekend. Yes, it's a hard life but someone (this time that would be me) has to do it. I was at the Eastern Ontario Needlers Retreat in Gananaque, ON teaching Gauge-Free mittens. Mittens you can knit to any size with any yarn. Here are some of the many results.
Thanks to Devon, Norma, Christine (who added stripes) and Nancy (who did 2 pairs). Great mittens. A lovely weekend with knitters.
-Deb

Friday 4 November 2016

Cowl with different sides

Our Cabin Fever Retreat was a great success. We knit a fabulous cowl with lots of join-as-you-go techniques.
Once it's joined together using a 3-needle bind off, it makes a cowl that looks different every time you put it on depending on which side is showing on the front. Cool, eh?

This cowl was designed by Elizabeth Fallone and the pattern will be posted soon in fingering weight yarn with gradient shaded colours. This cowl keeps you busy all the way through.

Off now to Gananoque to the Eastern Needlers Retreat to introduce them to Gauge-Free Mittens. Lots of fun.
-Deb

Thursday 27 October 2016

Cowl and Scarf back to the Yukon

It's snowing. Yeah!! I love the first snow. The air is so crisp and clear. I don't think it's going to last so whoo, hoo another cheer.

I mentioned that in the summer I knit a chimney cowl for my friend Jo in lace weight wool.

 Did I tell you the story? At the Sticks, String and Stewardship Retreat I won a special draw prize of hand painted wool which Jo brought from the Yukon where she lives. All the wool was from Yukon dyers. I thought some of this wool should go back to the Yukon so I knit Jo a cowl and a scarf.
There it is. She's worn the Chimney Cowl several times already. YAY.
And the Graduated Triangle Scarf has been worn too. She is obviously a knitworthy friend.
-Deb

Friday 21 October 2016

Retreating Soon

One more week before the Cabin Fever Retreat. I'm working on the project every day. Our focus this year is join-as-you-go. We think we have a wonderful cowl for our attendees to knit. Here are some highlights:
Steps with Stripes
Or Steps horizontally

Mitred Corners
Triangles
All joined together all the time. The knitters will be choosing which they use where so all the cowls should come out slightly different. Should be lots of fun.

Deb

Friday 14 October 2016

Yes, they're plastic

Do you find yourself apologizing for your knitting? "It's only a dishcloth." "It's only a plain sweater." "I'm only a beginner."

I do this with my sock needles. I'm working on my latest (3rd) pair of StashBuster Socks and my double pointed needles are plastic. I like them. A lot! They are the cheapest needles I can buy but I really, really like them. They're bendy and I'm hard on my double pointed needles that way. They're warm in my hands while I'm using them. They are slightly tacky so the stitches stay put.

OK, this is the kicker, they're coloured! My current set of dpn's are blue. I have a set of larger needles that are yellow and red. How cheerful is that.
They are not the slickest, fastest, most super duper pointed needles. But they're blue! I rest my case.
Deb

Thursday 6 October 2016

Playing with Mosaics

I did a Mosaic Workshop in Port Hope today. Great day. I love doing workshops with knitting guilds. There is always a great feel in the room. People know each other and are willing to help and encourage their neighbour. Just lovely.

The class project was a hat with this pattern on it. It's a garter stitch mosaic pattern.
I know that Yvonne had already taken the Mosaic class from me before so I was thinking about what I could give her to advance her mosaic skills. It occured to me that you could mix garter stitch and stockinette stitch mosaic to get a different affect.
She very willingly took the challenge. It is tricky to work. You have to keep your wits about you. I got the high sign so I think this pattern has legs. It may become a "real hat".
Deb

Thursday 29 September 2016

Spokes of a wheel

Because of the spokes in the yoke, I was going to call this pullover "wheels on the bus go round and round" but I thought it was a little long! LOL.
Instead I called it Bernie's Pullover. It's named after a friend of mine who was the inspiration for this pullover. Bernice Vollick has passed away but leaves a legacy of terrific childrens' patterns. She designed Sophia's Cardigan for Cabin Fever.

I thought I would knit a pullover version with colours since at one time we had talked about doing just that and never did. This pullover has spokes, with a combo of stockinette stitch and garter stitch ridges, plus 3 colours, knit from the Top Down.
Both of these spoked sweaters are enough to keep any knitter interested right from the beginning. Then you get to knit round and round, stockinette stitch, for a break and the fun of doing the colours again at the bottom. Sized for 1-6 year olds.

Now try to pick 3 colours!
Deb


Friday 23 September 2016

Finished, Yay

Wow, the Neapolitan as an adult sweater? I really like that idea. Would you use the same colours? I think I might like to do 2 colours close on the colour wheel and one colour opposite. I have an idea of a navy/emerald green/gold sweater. Although the soft white/grey/pale pink is so very pretty.

I finished another pair of Stash Buster Socks. They are perfect to knit when trying to do something else at the same time, like watching my daughter's curling game. I knit one sock while watching last weekend and the second sock in the car travelling. When I chose the 3 colours I envisioned a totally different looking sock. I am always surprised at how different they look when they are striped. I expected the blue/green to really stand out more than it did. Always a surprise.
I also just finished sewing in the ends of my Chimney Cowl. It's in lace weight, yes, I said lace weight. That was a lot, lot, lot of knitting. I put the stripes in so I would know I was progressing because it sure didn't seem like it some days. I blocked it twice to get it nice and drapey. I'm hoping to get someone to model it next weekend.
I would like to reknit it in fingering yarn, maybe without the stirpes and slightly shorter. There are short rows in there to make the Front (on the right side of photo) deeper than the Back. I think I would have liked to make it longer so it would go over the shoulders but I ran out of lace mojo!
Deb

Wednesday 14 September 2016

Neapolitan

I've put the cable knitting aside for the moment and have continued to knit up several more children's sweaters (1-6 years old).
I finished the Neapolitan.
It has what looks like random garter ridges but they are not really random at all. At the beginning of every wrong side row I looked to see if the stitches on my needle (from working the RS row) were the same colour as I was about to work the wrong side row in. If so, I knit. If the WS was a new colour, I purled. It's fun. For the pattern I wrote out every row. Tthen wrote it out again for the sleeve which is totally different because it's worked in the round. And then, just because I would use it, I wrote out the stripe rows and a chart for the colour sequence because maybe you, like me, might find it easier to follow than row-by-row instructions.

I also am knitting it in true Neapolitan ice cream colours.
I really like this colourway but at the recent K-W Knitters Fair it didn't attract any attention so I may be totally off base here.

This pattern has an I-Cord edge to the Fronts. It works even with coloured stripes. I was really happy with it. You do have to carry the yarn up inside the I-Cord but if you twist the colours at the beginning of every row it's very neat and tidy, even on the inside.
That's one. I'll show you the other new patterns in the next week or two.
-Deb

Friday 2 September 2016

I might be in your Neighbourhood

I'm embarking on a new adventure. I have arranged a Knitting Tour where I will be teaching 2 different classes. I'll be travelling from Ottawa, ON to Wolfville, NS and back. It starts in a couple weeks, yikes.

I'm teaching in 3 stores but I like to meet knitters anywhere I can. I'd be happy to come to your home. Email me: deb.cabinfever@gmail.com
If you live in Ottawa and have 4 or more knitting friends who would like to get together and do a class I'd be thrilled to do that.  I will be in Ottawa September 16, 17, 18 & 19. I can travel from Ottawa within an hour or two drive.
If you live in New Brunswick, I'll be driving through on Thursday September 22.

I'm teaching 2 classes. The fee for each class includes a 3 hour class, a kit for a child's pullover OR a kit for a pair of mittens, all the tips and tricks I know.  $50.00

Check out the class at your local yarn store:
Wool-Tyme in Ottawa, ON. September 20. Teaching Top Down Crewneck Workshop
Gaspereau Valley Fibres in Wolfville, NS, on September 24 & 25. Teaching both Top Down Crewneck Workshop and Gauge-Free Mittens
Petit Mouton in Point Claire (Montreal), QC, on September 27, 28 & 29. Teaching both Top Down Crewneck Workshop and Gauge-Free Mittens. I'll be teaching in English.

Top Down Crewneck Workshop
I'm going to take knitters through the process of making a crewneck on a pullover. You will be able to take a Top Down Raglan with a neckline with no shaping (I see many like this with a boatneck or squareneck, whichever you call them) and make them into a crewneck or scoop neck. A neckline where the front is lower than the back is comfortable and flattering. This includes short rows but no wraps or tricky stitches.

Gauge-Free Mittens
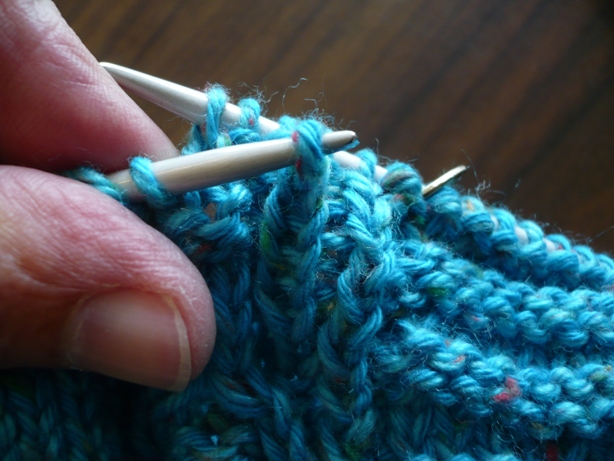
Do you hate swatching? Do things turn out the wrong size even when you conscientiously do one? This class is for you. You don't need to know your gauge from beginning to end. It doesn't come into play. You make the mitten to the size you need, 6" or 7" or 8" around for the hand. I have a new twist on making the thumb that's fun and eliminates using 4 double pointed needles. If you knit for charity from donated yarn without labels, this is for you.
Maybe I'll be seeing you soon,
Deb

Friday 26 August 2016

Neapolitan, 3 colours

I am really enjoying knitting this little sweater. The colours are so pretty together. I'm going to call it Neapolitan. I'm knitting it in between painting my cabin and caulking to keep out the demon "water". The bain of camp buildings.

The pattern is two different stripes and 3 colours. This combo gives it a lot of interest and is fun to knit.
Even these sleeves are fun. The trick appears to be to have something to concentrate on while knitting the sleeves. The pattern for this sweater changes from the body worked flat to the sleeves worked “in the round”. I rewrote it and then had to knit exactly what I wrote to make sure it was correct. All good.
On the second sleeve I gave myself the challenge of not looking at the pattern at all. I had to read my knitting as I went along. It had me stopping and giving it some thought but the sleeve went by in a flash.
I did have to go deck diving twice today. Double pointed needles and decks do not go together. The needle is right there....
This sweater is one of the new baby sweaters I will have kitted up in the Cabin Fever booth at K-W Knitter’s Fair on Sept. 10.
-Deb
P.S. t_a I totally agree. Not using a cable needle is scary but kinda fun.


Sunday 21 August 2016

Cabling Without A Cable Needle, 1 over 3 Cable

I also name this "Knitting Without a Safety Net". You will see why.

This is a Horseshoe Cable formed by two 1 over 3 Cables. The first Cable moves 1 stitch over 3 sts to the Left. The second Cable moves 1 stitch over 3 sts to the Right.

I start with my fingers. First the 1 over 3 CABLE LEFT where the stitch on the right is crossing over and in front of the 3 sts to the left.

That makes the 3 sts on the left the BACKGROUND STS and they are moving to the Right. Now to the actual knitting.

This works best with a sturdy, non-slippery yarn.
Move all the stitches to the tips of the needles. Take the 4 sts involved off the Left needle. YIKES. There they are hanging in mid-air.
With the Right needle, pick up the 3 Background sts. (I always pick up the Background sts first.)
 With Left needle, pick up the 1 stitch that is going to cross over in front.

Now slip the 3 Background sts back onto the Left needle. You can see the cross now.
Knit the 4 sts. Ta-Da. 1 over 3 cross Left is made.

Now for the other side of the Horseshoe Cable. The 1 over 3 Cross Right.
First the fingers.

Background sts will be moving to the Left.

Take the 4 sts off the Left needle
Pick up the 3 Background sts onto Left needle.
Pick up the 1 front stitch which will be crossing to the right with the Right needle.
Slip that 1 stitch onto Left needle and knit 4 sts.

Ta-Da. One Horseshoe Cable made with two 1 over 3 Cables Done.

You are now free to knit without a cable needle, if you dare!
-Deb