Sunday 28 February 2010

Hello from Santa Clara

Karen and I are having a ball here in California at the Stitches West show. This is one busy, busy show! Our hand-dyed Silk & Silver yarn and the lace shawls have been a big hit (have to take down the display today as there's none left). It's been great fun visiting with our customers who come back year after year and some brought their completed projects:
Sandy Paulson brought in this gorgeous example of the work she is doing from The Buttons Cardigan. She's added a beautiful ruffle to the edges and the colour accents really set it all off. I gather this is one of many, many she's done.
Robin Gordon brought in two of the Side to Side shawls that she's completed with a butter soft alpaca yarn (Misti I think the name was). While she was showing me the shawls, people could not resist coming up and stroking the back of our random model (that's Robin on the right and I don't know the name of the model as she just came to help with the photo and put the shawl on). The pattern really shows off the yarn and Robin says it's "so comfortable to wear".
And check out this handsome guy! He bought one of our T-Shirt's and was proudly wearing it yesterday! In fact we had two men running around the show with them on. They thought they were pretty funny. 

You'll be wondering about this next shot: 
Yes, those are oranges : )    Gwen Bortner, who is a teacher at the show, and a friend of us Canadians, brings us fresh (and I mean picked the day before) oranges from the tree in her back yard. We (Don & Buffy, Lana & Diane, Jill & Ron and Karen & I) devoured them. They are delicious and smell so good. It's our annual treat for sure.

OK, time to get off to the show.

-Lyn

Thursday 25 February 2010

Quite often on a big project things seem to stall for a while. That's a little scary when a deadline is coming up. But the Teen booklet has recently picked up speed and we are rolling downhill now. Bernice is testknitting my A-line cardigan.
This will be the shorter version of the long cardigan I made. And Dana is working on Bernice's Hoodie.
She's most of the way up the Back Panel here. Next week the sweaters might be finished (fingers crossed) and to move the patterns along I'm going to be editing and crunching numbers over the weekend. Bernice has offered to introduce me to spread sheets, new territory for me and exciting stuff indeed. I'm totally serious, this could make pattern writing much easier in the future.
-Deb

Wednesday 24 February 2010

Tonight at our knitting guild we got the inside scoop on lining a sweater.
It makes them sooo warm and Ann showed us that it's easier than I thought. The trick is to make the lining bigger than the sweater so when the sweater stretches across your shoulders the lining will go with it. This is Ann with one of her mohair sweaters on.
And her daughter-in-law, Laurie, with another gorgeous one on. This is Laurie's winter coat. Ann brushes the mohair inside and out with a hair brush before putting the lining in. She makes all of these without a pattern and each one has a different colour design using beads and shiny yarn or whatever takes her fancy.
They are beautiful, soft and very warm. Such talent.
-Deb

Tuesday 23 February 2010

Surprise, surprise, yes the green lace sweater is worked from the bottom up. Hey I'm a versatile person, OK not really so much but this has been interesting to do. I'm putting in the same photo because it doesn't look very much different than this, it's just several inches longer. What you won't be able to notice is that I've progressed from a 5.0mm needle at the bottom to a 4.5mm needle in the middle and now I'm working with a 3.75mm needle. This is going to A-line this slightly. I'm very close to making a change from the lace. Yeah you gotta love when the changes come up.
In this blog you get me bleating on about Top Down because it's hugely interesting to me and I love exploring the various aspects of it. But the Cabin Fever motto is 'when you cast off you're done' which translates into minimal finishing and working in one piece. Top Down fits perfectly into this way of thinking but so does bottom up and multidirectional and all sorts of other constructions. I rely on others now to come up with the other ways of avoiding seams since working Top Down has captivated me. But I'm having fun with this lace number and I'm probably half done now, yay.
-Deb

Cute T Shirts

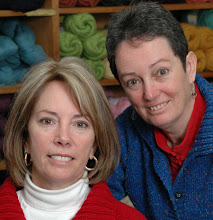
Jennifer just left a message, on the blog that I posted after the Stitches West show last year, asking where she could buy the T-shirts we were selling at the show. That's me & Karen with them on:
The t-shirts have K2, P2 across in columns, and the writing says "Ribbed for your pleasure". Cute, eh? This year we have both fitted (tight) and regular men's style shirts. We will have them for sale at the Stitches West show this weekend (Santa Clara, CA) and will be bringing any left home with us for the next show. So, if anyone wants one (besides Jennifer), put in an order, including a size, and I'll put one aside for you.
-Lyn
NOTE:  If you include your email address on the blog comment, we can get back to you directly.

Sunday 21 February 2010

This is a report card of my progress on the testknitting for the Teen booklet.  The sleeves are coming along.
At least one sleeve is. A top down always looks so much better once the sleeves begin. I had a random thought, could you work both of them at the same time? I was thinking of trying it but the 4 balls of yarn dangling was a deterrent for this project. I might give it a shot on a one colour garment some time. (I think this photo is a reflection of my fuzzy brain this morning. How does the camera do that?

I started the testknit of a lace tunic and it's very enjoyable knitting, except for the 2 mistakes I made (totally my own fault) which had to be tinked back to discover that there was one more mistake I had overlooked. Sometimes tinking is really rewarding. Now I'm back on track.
-Deb

Monday 15 February 2010

Yes, I'm still honeymooning with the stripes. We are doing wonderfully well. But I've run out of black yarn for the moment so I'm taking a small break and working on editing patterns. Trading the needles in for the keyboard means my fingers are still a-twitching.
Just the sleeves to do, we're on the home stretch. If you want to see one of the other Teen sweaters we are working on, check out  http://mommabearknits2.blogspot.com/ . Bernice has her sweater done! I am trying to catch up.
-Deb

Friday 12 February 2010

Lace Shawls

Thought I'd drop in a photograph of the shawls I'll be taking to Stitches West in 11 days. (Wow! That show snuck up fast!) I've really enjoyed knitting these shawls and it's so interesting to see the different effects with different yarns and colours.
The shawl on the right is knit in our Cabin Fever Silk & Silver fingering weight (superwash merino/silk/sterling silver) which I dyed in shades of black/blue and hints of purple. You can't see it in the photograph, but the silver gives it a lovely, subtle, glitter. Very pleased with that. The pattern is leaves surrounded with ripples and the border has little clear beads with silver in their centre.

The shawl in the middle was the first one I did and it's in the Fibre Isle bison light sock weight yarn in it's natural colour. Very light and delicate and lovely to work with. The pattern is leaves and medallions and the beads on the border are clear glass.

The shawl on the left, which I just completed, is knit in Shelridge Farm's superwash merino in DK weight. The colour is "celery" but it said leaves to me! I'm taking these to the show as kits as we stock or dye all these yarns.

All of the shawls are knit from the top-down beginning at the garter stitch centre. And all the shawls are done using the "Knitting Lace Triangles" by Evelyn A. Clark. I am a big fan of hers! 

I've been writing up, and test knitting, the accessories for the teen book over the last few days so knitting up the samples, in hopefully their final format, is my plan for the long weekend while watching the Olympics. First off is the scarf to match Deb's Waffle Jacket. The mittlet looks lovely and I think the scarf will be terrific.

- Lyn

Tuesday 9 February 2010

Big projects don't give me much to talk about. I am being very monogamous. This is the only project I am carrying around with me. We watch movies together, listen to audio books together, slip in the odd stolen round together.
And we are getting along famously. So if I am ignoring you a little you know who I am hanging out with. I will return when the honeymoon is over.
-Deb

Friday 5 February 2010

I know this stuff can make your head hurt. It's so much easier to do than it is to explain. But I AM SO EXCITED. I think this is going to work. I will try to explain . . . more techy talk.

In a regular top down you increase at the beginning and end of 4 sections of the sweater: the shoulder section, Back, second shoulder section and the Front. That makes 8 increases every second round. To make the Front lower than the Back of neck, you need to put more rows across the back of neck - in essence you are raising the back of neck in order to lower the Front of neck. How to accomplish this is tricky and there are several ways to do it.

For a moment go back to a regular crew neck sweater, for the collar you pick up stitches across the back of neck and then pick up stitches for the front of neck. There are a lot more stitches picked up for the front of the crew neck collar, right? How can we duplicate this process when we are working from the top down beginning with knitting the collar. The new way I have come up with, and I really think this is going to fly, is to cast on extra stitches on the front of the collar. Then work the short rows: work across the the shoulder, back of neck, second shoulder and down the Front a little bit, TURN, purl back across shoulder, Back and second shoulder to other side of Front and work down the Front a little bit, TURN. Continue to work across the back of the sweater, working down a little further on the Front each time.
So what I get is a Front of neck with only a couple of rows on it.

And a back of neck with lots of rows on it. Which raises the back and lowers the Front. The new trick I figured out is to put an extra number of stitches in the collar for the Front of neck and then work the increases in the shoulder section, back of neck section and second shoulder section ONLY - 6 increases worked. No increases are worked in the Front section at all, the number of stitches in the Front section stays the same. So if the back of neck has 30 sts in it and the Front of neck has 42 sts, I could work the short rows and make the increases in both shoulder sections and in the back of neck section until the back of neck catches up to the Front of neck. When the Back of neck also has 42 stitches I stop the short rows. Ta, da the Back has 12 more rows than the Front so the Front is lower and both Front and Back have 42 sts. It works!

Here's a close up. The shoulder (on right side of photo) has sts increased in it and the Front (on the left) has no increases. I have written all this down and it still makes sense. I am delighted. Let the stripes begin.
-Deb

Thursday 4 February 2010

The experiment didn't work. It somehow doesn't look right.
The stripes are too round at the top and there is a giant blip in the fabric where I began the raglan shaping. So the combination of round yoke shaping into raglan shaping is not working for me.
I really want this more traditional looking set up of the stripes. This is the standard raglan shaping where,  because there are short rows lowering the front of neck, the beginning of the round is at the Left Front shoulder. All the pairs of increases would start at the Left Front shoulder. But the stripes should begin at the Left Back shoulder. So that means you would begin your rounds with your increases at the front shoulder and then at the back of the shoulder change colours for the stripes. Too confusing. So I thought I would try putting the short row shaping in the collar.
Front
I think this is going to work. The back is higher and it gives me the traditional squareness for the stripes. I just have to write out the short rows as plainly as I can. OK, I'm going to do that right now. See ya,
-deb

Tuesday 2 February 2010

I'm experimenting again. It sounds like there should be bunsen burners and funny shaped glass vessels with green liquid bubbling away. My green yarn is producing results without any bubbling.
I am playing with the space between the short rows used to lower the front of my top down garment. My normal spacing for short rows: work to certain spot, turn and when I come back to the same side I knit past the first short row and turn 2 stitches later. This produces a 45 degree angle to the ribbed neckband.

Here I knit 3 stitches past the first short row turn. It flattens out the angle of the neckband.

I am working on a striped top down pullover. The problems arise when you think of working short rows to lower the front of the neck and work stripes at the same time. If I did this as a raglan top down the beginning of the round is at the Left Front shoulder - the short rows are worked from Left Front shoulder, knit around the back of neck to Right Front shoulder and back again. But the colour changes for the stripes should take place at the Back Left shoulder so they are not as visible.  So I'm experimenting with a combination of a circular yoke (like an Icelandic sweater) for the beginning, short row shaping. Then I will knit around to the Back Left shoulder and switch into a raglan style for the stripes. So far the neckband and short row shaping is going well.

I'm listening to an audio book of Jane Austen's Sense and Sensibility. It makes all the plain knitting go by pretty quickly. Although I have noticed that there seems to be no mention of knitting in this book.
-Deb