Showing posts with label vest. Show all posts

Thursday, 6 July 2017

Lightening picture day

It's time to get out my phone and take some photos. My camera is in repetitive cycle of zooming in and out and then shutting off. I think that means it's toast. So I'm debating about buying another camera or using my phone? Any thoughts on this?

My Lightening pullover is done and on my mannequin. No one to take my photo so she is it.
I even dressed her up and put a skit on her. She's better dressed than I am. 

The Lightening Bolts get larger and larger as they travel down the sweater. I charted it all out although I'm sure you can figure it out pretty quickly. Then you just have to count holes. They also go down the sleeve shoulder.

The yoke starts out with 8 bolts and then is widdled down to 4 and then only 2. It will keep you on your toes!

There is side shaping too. Lots to keep you busy.
One more check through the pattern and then I will post it next week. I already have my next sweater idea waiting in the wings. It's anxious to be centre stage.
Deb

Thursday, 29 June 2017

Raining while Lightening Bolts dry

Sometimes designs take a very long time to finalize. I'm close on the Lightening Bolts. It's been a journey with changes, changes back and then reversed. The only idea I had in my head at the beginning was for the yoke with the lightening bolts. The rest of the sweater needed to be worked out on the needles, ripped back and worked again. I'm really happy with the shaping which formed because of the continued increases down the front and back and the decreases needed at the sides. A happy result.

 It's washed now and photos are up next. Not today since it's raining again while my sweater drys, sort of.

Deb
P.S. Thanks for the hat crown suggestions Brenda. I will put them in. The first triangle goes around your entire head. The second triangle fills in the space to make it a tube. Now I'm working on putting stripes in just for the fun of it.

Monday, 6 June 2016

Mosaic boxes

It's the end of our Knitting Guild year. Yesterday we spent it at Linda's house learning to knit Mosaic boxes and V-neck Top Down knitting. It was a great day. Here we are, knitters hard at work, ha, ha.

Really we were learning how to read a mosaic chart. They are different from other charts.
Mosaic is colour knitting, working with only 1 colour across the row at a time. You knit the stitches you want to show in the particular colour you're working with and slip all the other sts. It's often found in your stitch dictionary in the Slip Stitch section.

Each row of the chart requires two passes (rows) of the same colour. With the Light Colour work the first row of the chart two times (Rows 1 & 2), once with the Right Side facing and back again on the Wrong Side. Now move to the second row of the chart and with the Dark Colour work it across on the Right Side and back again on the Wrong Side (Rows 3 & 4). Every row of the chart is worked twice with the same colour. Then the next row of the chart is worked twice with the next colour, alternating 2 rows Light and 2 rows Dark. It makes mosaic charts different from any other type of chart. Geometric designs result. The different colours make it look different.


These two below, have the colours reversed. The boxes are Light and the Background is Dark. To read the chart above and switch the light and dark is a real challenge and K & T did a terrific job.
Boo, hoo, that's it for Guild nights for a while. I'm going to miss my knitting buddies over the summer. Looking forward to seeing everyone in September.
Deb

Thursday, 2 June 2016

Add Mosaic

Adding a little bit of Mosaic to this vest really makes it look different. Can't wait until the class I'm teaching on Sunday gets started so I can see how it looks in different colours. I did it in Cotton Tweed Denim with Sky Blue. It would look more dramatic with a greater contrast between the colours.
As you know, blue is my go-to colour. But I'm going to see what other colours I can choose to make more impact. The vests in the class will give me some good ideas I bet. Now I'm going button shoping. Always an adventure.
-Deb

Thursday, 11 December 2014

Underarm Baby Vest Solution

After much pondering I think I have a solution to the Vest underarm quandary. With Baby sizes a top down doesn't need any stitches cast on at the underarm so at the Divide Row the Front and Back are being joined up as you work the row. I'd like the join between the Front and Back to be nice and tight and I also have to reduce the stitch numbers so the stitch pattern can continue across the entire body.

On the Divide Row, after casting off the stitches of the first sleeve, pass the last stitch of the Front over the last Cast Off stitch of sleeve. This will join the Front and Back together. It works. I hope the diagram helps to explain it in the pattern. What do you think?
-Deb

Friday, 21 November 2014

Girl Stepped Pattern

I'm testknitting the Baby Vest pattern with a stepped stitch pattern. The boy's version is done and now I'm knitting one in a girl colour. 
I've done charts and written instructions. It's so logical to me when I look at the charted version. It's the written instructions that take quite a bit longer to write and check. Charts or written, which works for you?

I'm really pleased that the pattern is showing up so well. Almost to the Great Divide. A vest is so quick to knit. I feel like I'm almost done.
-Deb

Thursday, 6 November 2014

Stepped Stitch Pattern

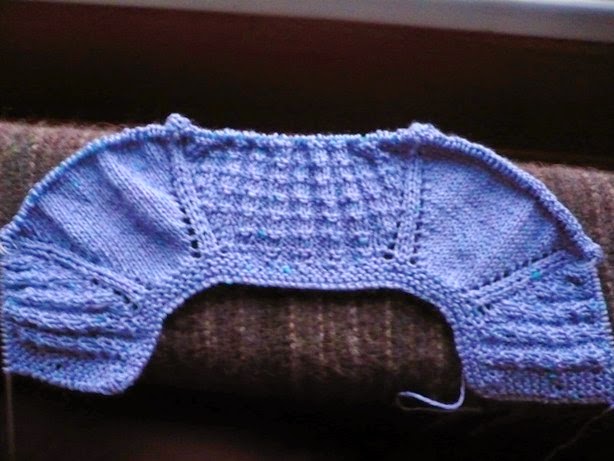
This is a little baby vest I just finished knitting for a workshop I'm giving this weekend at the Eastern Needlers Retreat in Gananoque, ON. We'll be experimenting with adding stitch patterns to top down garments. This little vest is based on the Basic pattern from the Need A Baby Cardigan book. Working cap sleeves makes it a really quick knit. I added the waffle stitch on the Fronts and Back.

Patterns are a little more of a challenge to introduce from the top down. This pattern is stepped. The stitch pattern is 4 stitches wide. Increases are worked at the Raglan line and when 4 more increases are worked there are 4 more stitches available on the Front to work another repeat of the pattern.  I'm going to write this one up next week so you can try it yourself.
Deb

Thursday, 22 November 2012

We have a new pattern up on Patternfish - Side Panel Vest . It's a Top Down with short rows to shape the V-neck. You have lots of choices to make this your own creation.
  • Choose either worsted weight yarn or heavy worsted weight yarn (aran).
  • Choose 4 buttons or buttons all the way down the front.
  • Choose which pattern you want to work down the sides (or put in one of your own favourites): Lace Pattern or 2 x 2 Rib.
  • And because it's Top Down you decide how long you want it to be.
I can't wait to see how these choices result in different looking vests.

Monday, 15 October 2012

I hope today is sunny because I need some good photos of the vests I finished and the 2-colour shawl.
The patterns have gone to my tech editor and should be back by the end of the week and up on patternfish next week. Yay. Time to move on to something new.

Lyn's going off to the Rheinbeck Sheep and Wool show this week. She'll be in the Shelridge Farm booth. Any other lucky people making the trip?
-Deb

Monday, 1 October 2012

Buttons are on!!! I hope I can hear the applause. Ha, ha. I sewed these on so that I could avoid another job. Oh sorry but I HAVE to sew these buttons on, right now! Now it's a pleasure.
This is in a Heavy Worsted/Aran yarn,  Belfast by Kraemer Yarns in the U.S. and distributed by Cabin Fever in Canada. This vest has a ribbed panel down each side.
This one is in worsted weight yarn, W4 by Shelridge Farm, kettle-dyed superwash in the Wedgewood colour. Lovely to knit.
The lace pattern down the side was fun to do.
Now I'm checking the patttern and I need a better photo too. Next week it should be up.
-Deb

Friday, 28 September 2012

If I put it in writing then it's a promise, right? I'm sewing buttons this weekend. You read it here so it must be true.
These two vests will be finished on Monday.

Meanwhile on the knitting front, I'm further along on my Twist Panel from the Need A Plus Cardigan? book.
I'm starting the waist shaping now. The pattern is memorized and I'm trying to decide how long to make it.
-Deb

Monday, 9 November 2009

The class on Saturday at the Grey Heron in Collingwood http://www.greyherondesigns.com/ went really well. A lovely clothing store with a really inviting wool room. Nice combination.
We had lunch after the class, thanks Karen that was really terrific. It gave us a chance to have a more casual chat because during the class we have to move along as you know if you've been a knitting student. We had a great time and every student had knit at least one top down before, which opens up lots of discussion on substituting increases and alterations of patterns for a better fit.
Brenda wore her top down to class. Isn't it beautiful? She took one of the solid coloured patterns out of the Button Up Your Top Down and really jazzed it up. It's gorgeous. For more photos check out her blog http://brenda-bjhf.blogspot.com/.

Back at the ranch I have made some progress on all fronts. My socks are getting a little longer and I have sketched out a rough pattern. This means I have drawn little squares on a piece of paper which represent the number of stitches on each of the needles at different points of the sock. Nothing in writing yet but it's coming along.Oops, you'll have to cock your head to see that properly. And my quickie baby pattern is almost done. I'm doing the last test knit. I now have 3 little tiny baby sweaters. One will go to some shows with Lynda, one will go to the shop which gave me the yarn and one will be in residence at our warehouse shop.
I'm also really enjoying testknitting the Valentine. Here is the original sample in a more appropriate colour.It's a fun pattern to work. Excuse me while I go and work a couple more inches.

-Deb

Monday, 2 November 2009

Lace and Cables

Hope you had a happy halloween. We had very few kids show up at the door. Our neighbourhood must be aging or else kids don't come to strangers' houses anymore. Lots of candy left for me, yay.

I have a new project to show you. I am at the testknitting stage on a design by Elizabeth McCarten. She's commented on the blog so you already know her a little. It's a great design and I have the little bit I've knit to show you.
That's the set up of the top down neck shaping. I know you can't see very well but it worked perfectly.Is the pattern on the back terrific or what?! It's fun to knit and I can't wait to get going on the rest. I have been searching for a yarn which would suit this design and show off all the cables. I'm really happy with how this wool worked out and today I'm going to buy enough to get going on it for real.

I decided to try the cardigan as a vest. You can see where I ripped back a couple of times. I decided on the vest idea after I was a good way down the sweater. Note to self: planning ahead might be a good idea, ha, ha. You never know when an idea will pop up. Often it's at an inconvenient time.This is a really quick knit. I should be able to get this finished and up on the website soon.

-Deb

Friday, 23 May 2008

Shrugs .. vests ... what would you call it?

I think I might have mentioned that I was fooling around with shrugs? Or, are they vests? Vrugs? Shests? Any thoughts on names?

At any rate, poor Morgan, my niece, had a terrible cold while we were up at the cabin last weekend but was good enough to pose for me with the shrug/vest thingie. This was my first go, and alas was too small for me but seems to fit her fine. She's gone off with it and as it's a machine wash and dry cotton/acrylic it should do just fine! It's quite appropriate that it go to Morgan, as I was shopping with her a few months ago and was amusing myself looking at "knitted" items in the store while she was several hours (oops, minutes) in the change room. I'm sure the sales staff were wondering what on earth I was doing as I was examining this shrug thing in minute detail and trying to work out the proportions. It was knit in pieces, of course, and my first attempt does have a bit of sewing. My 2nd attempt, to hopefully fit me, is going to be knit in one piece of course as I am NOT a good finisher.


The lapel is in a loose rib with the back done in a simple lace. I like how the lace "curves" on the back and gives it an interesting look. The original one in the store had a cable back but I wanted something more summer-like and airier so thought the lace was a better choice. It looks VERY strange when you are holding the garment in your hand. It looks like a sweater except that there is no hole for the head! Which is exactly what Mom said "where's the head"???


Well, this was my break from working on the Baby booklet. Time to get back at it! Here's another picture from the booklet ... isn't she too cute??!!

Lynda


Monday, 8 October 2007

Amy's Vest


I was just tossing around subjects for this blog, I am getting ready to go to Baltimore for the Stitches Fair and rather distracted and restless as a result, when I read a comment by Amy. She wants to knit an adult vest based on the Playtime Vest (ages 4 - 10 year olds) (see http://www.cabinfever.ca/ under Patterns and Kits.

Here is our sample from the CabinFever shop.

You CAN take a pattern which is entirely the wrong size and work it in a different wool for yourself. In general you are following the original pattern. But the particulars are up to you when you do the switch.

The whole thing is based on your new gauge. So do a square with the appropriate needles for your wool and count how many stitches you are getting in 1" (count the fractions of stitches). You might be getting 4 1/4 sts = 1". Use this number as your gauge and then when you work out the numbers for the vest change any fractions to a whole number larger or smaller, your choice.

Measure your bust and decide how much ease you are adding. Multiply the number of stitches in 1" (above) by the final measurement you've decided on. For example: If I want a 42" vest and I get 4 1/4 sts per inch then 42" x 4.25 sts = 178.5 sts for the vest body. Round off to 178 sts.

I would follow the basic instructions for the vest substituting your own numbers. If the pattern says to cast on with a smaller needle - cast on with a needle 2 sizes smaller than your body sized needle. Work the body.

This pattern has armholes bordered by 5 stitches in garter stitch. Keep a close eye on the photo because the garter stitch edging starts before you split the knitting into the front, back, front. As long as the garter stitch border when you start is centred over where the bottom of your armhole will be, you'll be fine. But check the proportions. A 5 stitch garter border on your armholes will look different than they would on a child's vest. This is where your judgement comes in. You'll need to widen the bottom cast off of the armhole so that the shoulders come in to where you are placing them. Or else work shaping beside the garter stitch border to bring the armholes in to where the shoulder should be.


The other spot to watch is the back of neck. Measure the back of your neck and add an inch or two to accommodate the border you are going to work later, multiply by your no. of sts in 1" and work the back so that this is the number of stitches left for the back of neck. On the Fronts, work the V-neck shaping until you will have the same no. of stitches for the shoulders that match the back and work straight up.

I am still rather disjointed here. What I might suggest is that you work up the small size and then you can see what is involved in the pattern. You will have a better idea of the changes you will need to make.

It's not as hard as it seems. You have to look as you go and make the adjustments you think will give you what you envision. I would advise making a schematic of a vest (just a simple drawing will help a lot) and measuring a vest you own to get the armhole depth and back of neck measurement.

Check, check, check as you knit so you can see how it's going to look. I think this is a great project for changing gauge and size.

This is your mission if you decide to take it. This message will NOT destruct in 5 seconds. Good Luck Amy,

-Deb